In this post, I am going to show, how to create a simple Node.js HTTP server.
I took the example of creating the following:
1. A HTML that auto submits geolocation latitudes and longitudes to a Node.js HTTP Server.
2. A js file that creates HTTP Server using http module in Node.js.
The server:
In Node.js we can create a simple HTTP Server using http module.
we can import http module like this:
var http = require('http');
we can create server using the following:
we have to pass a simple callback to the 'createServer'.
http.createServer(function (request, response) {
response.writeHead(200, {'Content-Type':'text/html'});
response.write("<p style='color:red;font-size:30px'>This is a Node JS HTTP Server</p>");
response.end();
});
Using writeHead one can set status and content type.
Things we need to return to the client will be written in 'write'.
One has to definitely end the server using 'end', otherwise page loads and loads.
My complete server code:
I used a HTML form that finds latitude and longitude using geolocation API in javascript and auto submits a form in 3 seconds.
The form submits itself to the server for a response.
My HTML code:
This also can be simply written as :) :
Results I have got:
I have masked the latitude and longitude on purpose, one can view them fully.
My HTML page:

Once this shows up user can click the submit button there below in 3 seconds, else it auto submits.
I assigned an id to the form and I used this code to auto submit the form to the server.
Action attribute is assigned with server's path and I used get method.
document.forms['f1'].submit();
I used the above code in a setTimeout method callback to buy some delay (3 seconds in this case).
Used general geolocation API to retrieve the location's latitude and longitude.
Server returns this:

Node logs:

Geolocation API by default is not supported by Node.js
One would have to install it using npm like this:
npm install geolocation
Once installed one can import geolocation using:
var geolocation = require('geolocation');
And general callback goes as normal javascript geolocation call.
Code goes like this with geolocation module installed on node.js
Please don't hesitate to drop in any suggestions, happy learning.
I took the example of creating the following:
1. A HTML that auto submits geolocation latitudes and longitudes to a Node.js HTTP Server.
2. A js file that creates HTTP Server using http module in Node.js.
The server:
In Node.js we can create a simple HTTP Server using http module.
we can import http module like this:
var http = require('http');
we can create server using the following:
we have to pass a simple callback to the 'createServer'.
http.createServer(function (request, response) {
response.writeHead(200, {'Content-Type':'text/html'});
response.write("<p style='color:red;font-size:30px'>This is a Node JS HTTP Server</p>");
response.end();
});
Using writeHead one can set status and content type.
Things we need to return to the client will be written in 'write'.
One has to definitely end the server using 'end', otherwise page loads and loads.
My complete server code:
1 2 3 4 5 6 7 8 9 10 11 12 | var http=require('http'); var url = require('url'); http.createServer(function (request, response) { response.writeHead(200, {'Content-Type':'text/html'}); response.write("<p style='color:red;font-size:30px'>This is a Node JS HTTP Server</p>"); var latitude = url.parse(request.url).query.split("&")[0].split("=")[1]; var longitude = url.parse(request.url).query.split("&")[1].split("=")[1]; response.write("<p style='color:Red; font-size:30px;'>Position's latitude is: "+latitude+"<br/>Position's longitude is: "+longitude+"</p>"); console.log(latitude+" | "+longitude); response.write("<img src='https://maps.googleapis.com/maps/api/staticmap?center="+latitude+","+longitude+"&zoom=12&size=300x300&sensor=false'/>"); response.end(); }).listen(3000); |
I used a HTML form that finds latitude and longitude using geolocation API in javascript and auto submits a form in 3 seconds.
The form submits itself to the server for a response.
My HTML code:
1 2 3 4 5 6 7 8 9 10 11 12 13 14 15 16 17 18 19 20 21 22 23 24 25 26 27 28 29 30 31 32 33 34 35 36 37 38 39 40 41 42 43 44 | <html> <script> navigator.geolocation.getCurrentPosition(function(positionVar) { var coordinates = positionVar.coords; var br = document.createElement("br"); var inp1 = document.createElement("input"); inp1.value="Latitude"; inp1.disabled="disabled"; inp1.backgroundColor="red"; document.body.appendChild(inp1); var inp2 = document.createElement("input"); inp2.value="Longitude"; inp2.disabled="disabled"; inp2.backgroundColor="red"; document.body.appendChild(inp2); document.body.appendChild(br); var form1 = document.createElement("form"); form1.action='http://localhost:3000/latitudesAndLongitudes'; form1.method="get"; form1.id="f1"; document.body.appendChild(form1); var latitude = document.createElement("input"); latitude.type="text"; latitude.value=coordinates.latitude; latitude.name="latitude"; form1.appendChild(latitude); var longitude = document.createElement("input"); longitude.type="text"; longitude.value=coordinates.longitude; longitude.name="longitude"; form1.appendChild(longitude); form1.appendChild(br); var submit = document.createElement('input'); submit.type="submit"; submit.value="Click Here to navigate to the server"; form1.appendChild(submit); setTimeout(function() { document.forms["f1"].submit(); }, 3000); }, function (err) { throw err; }); </script> </html> |
This also can be simply written as :) :
1 2 3 4 5 6 7 8 9 10 11 12 13 14 15 16 17 18 19 20 21 22 23 24 25 26 27 28 29 30 31 | <html> <head> <script> function function1() { navigator.geolocation.getCurrentPosition(function(positionVar) { var coordinates = positionVar.coords; document.getElementById("id4Lat").value=coordinates.latitude; document.getElementById("id4Lng").value=coordinates.longitude; var f1 = document.getElementById("f1"); setTimeout(function() { document.forms["f1"].submit(); }, 3000); }, function (err) { throw err; }); } </script> </head> <body onload='function1();'> <form action="http://localhost:3000/latitudesAndLongitudes" method="get" id="f1"> <input type="input" disabled="disabled" value="Latitude"/> <input type="input" disabled="disabled" value="Longitude"/> <br/> <input type="input" name="latitude" id="id4Lat"/> <input type="input" name="longitude" id="id4Lng"/> <br/> <input type="submit" value="Click Here else wait for 3 seconds"/> </form> </body> </html> |
Results I have got:
I have masked the latitude and longitude on purpose, one can view them fully.
My HTML page:
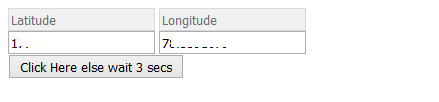
Once this shows up user can click the submit button there below in 3 seconds, else it auto submits.
I assigned an id to the form and I used this code to auto submit the form to the server.
Action attribute is assigned with server's path and I used get method.
document.forms['f1'].submit();
I used the above code in a setTimeout method callback to buy some delay (3 seconds in this case).
Used general geolocation API to retrieve the location's latitude and longitude.
Server returns this:

Since I used get method to submit the form, you can see the query string in the address bar in above image showing us the parameters.
In node, we can get query string using url module like this:
var url = require('url');
url.parse(request.url).query;
Geolocation API by default is not supported by Node.js
One would have to install it using npm like this:
npm install geolocation
Once installed one can import geolocation using:
var geolocation = require('geolocation');
And general callback goes as normal javascript geolocation call.
Code goes like this with geolocation module installed on node.js
1 2 3 4 5 6 7 | var geolocation = require('geolocation'); geolocation.getCurrentPosition(function(positionVar) { var coordinates = positionVar.coords; //lats and lngs likewise }, function(err) { throw err; }); |
Please don't hesitate to drop in any suggestions, happy learning.
No comments:
Post a Comment